Install dmenu from source code on Raspberry Pi

So what is dmenu? dmenu is a dynamic menu for the X Window System and Raspberry Pi runs Linux. It is simple and can manage large numbers of user-defined menu items efficiently. And one more thing you need to install it from the source code so it is a good exercise to learn how to compile a program in Linux.

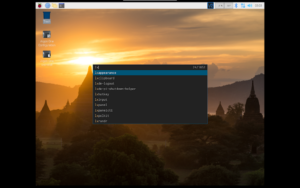
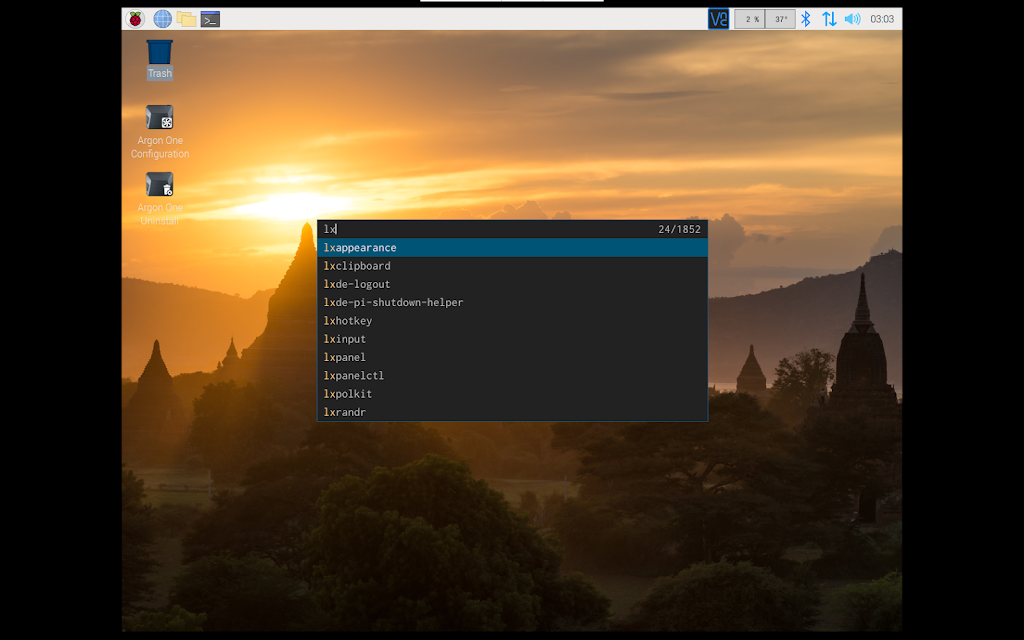
dmenu configured to show up in the middle of the screen


Software is freely available from suckless.org, and there is also “dwm” windows manager for X, “st” simple terminal, “surf” simple web browser, and more.
dmenu configured to show up on the top of the screen

First, we need to update the system and install dependencies:

sudo apt update
sudo apt install xorg-dev
sudo apt install build-essential
sudo apt install git

Clone dmenu git repo:

git clone https://git.suckless.org/dmenu

Change directory:

cd dmenu

Build and install dmenu:

sudo make install

And we are ready to run dmenu from the terminal and use it. It shows up above on top of the panel. But it is smaller than the panel and there are fever patches that can help us to look better.

Remove compiler output files:

sudo make clean

Removing config.h file helps to apply patches:

sudo rm config.h

Download desired patch:

// numbers
wget https://tools.suckless.org/dmenu/patches/numbers/dmenu-numbers-4.9.diff
patch -p1 < dmenu-numbers-4.9.diff
sudo make install
sudo make clean
sudo rm config.h

// center
wget https://tools.suckless.org/dmenu/patches/center/dmenu-center-20200111-8cd37e1.diff
patch -p1 < dmenu-center-20200111-8cd37e1.diff
sudo make install
sudo make clean
sudo rm config.h

// highlight
wget https://tools.suckless.org/dmenu/patches/highlight/dmenu-highlight-20201211-fcdc159.diff
patch -p1 < dmenu-highlight-20201211-fcdc159.diff
sudo make install
sudo make clean
sudo rm config.h

// line height
wget https://tools.suckless.org/dmenu/patches/line-height/dmenu-lineheight-5.0.diff
patch -p1 < dmenu-lineheight-5.0.diff
sudo make install
sudo make clean
sudo rm config.h

// border
wget https://tools.suckless.org/dmenu/patches/border/dmenu-border-4.9.diff
patch -p1 < dmenu-border-4.9.diff
sudo make install
sudo make clean
sudo rm config.h

With this part of the setup, we are gonna create keybindings for an easy run as a top panel or in the middle of the screen.

Edit Raspberry Pi OS keybindings:

sudo nano /etc/xdg/openbox/lxde-pi-rc.xml

Add this lines in <keyboard> section:

<keybind key="C-S-space">
    <action name="Execute">
        <command>dmenu_run -h 36</command>
    </action>
</keybind>
<keybind key="C-space">
    <action name="Execute">
        <command>dmenu_run -h 30 -c -l 10</command>
    </action>
</keybind>

Now if we press a key combination SHIFT + CTRL + SPACE runs dmenu above the top panel and pressing CTRL + SPACE runs dmenu in the middle of the screen. And that all for this late-night adventure with Raspberry Pi.

Till the next time.
Install PICkit 2 Development Programmer / Debugger on Raspberry Pi OS.

To install PICkit 2 Development Programmer / Debugger on Raspberry Pi OS, we are gonna first prepare our system by installing dependencies, download source code for PICkit 2 command-line application, compile it, and at the end verify test installation.

So for that, we are gonna use these commands as follows:

Update and Install dependencies:

sudo apt update
sudo apt install build-essential libusb-dev

Download and unpack the source files:

wget https://ww1.microchip.com/downloads/en/DeviceDoc/pk2cmdv1.20LinuxMacSource.tar.gz
tar xzvf pk2cmdv1.20LinuxMacSource.tar.gz
cd pk2cmdv1.20LinuxMacSource

Building the application:

make linux

Installing the application:

make install

Adding device file location to PATH:

echo 'export PATH="$PATH:/usr/share/pk2"' >> ~/.bashrc

Reboot system and test installation:

pk2cmd -?v

# PICki2 not connected
Executable Version:    1.20.00
Device File Version:   1.55.00
OS Firmware Version:   PICkit 2 not found

# PICkit2 connected
Executable Version:    1.20.00
Device File Version:   1.55.00
OS Firmware Version:   2.32.00

Uninstall pk2cmd:

Remove file pk2cmd from /usr/local/bin:
sudo rm -R /usr/local/bin/pk2cmd

Remove all files from /usr/share/pk2/:
sudo rm /usr/share/pk2/*

Remove folder /usr/share/pk2/:
sudo rm -R /usr/share/pk2

Edit file .bashrc:
sudo nano ~/.bashrc

Find and Remove line :
export PATH="$PATH:/usr/share/pk2"

Stay healthy and safe till the next time!

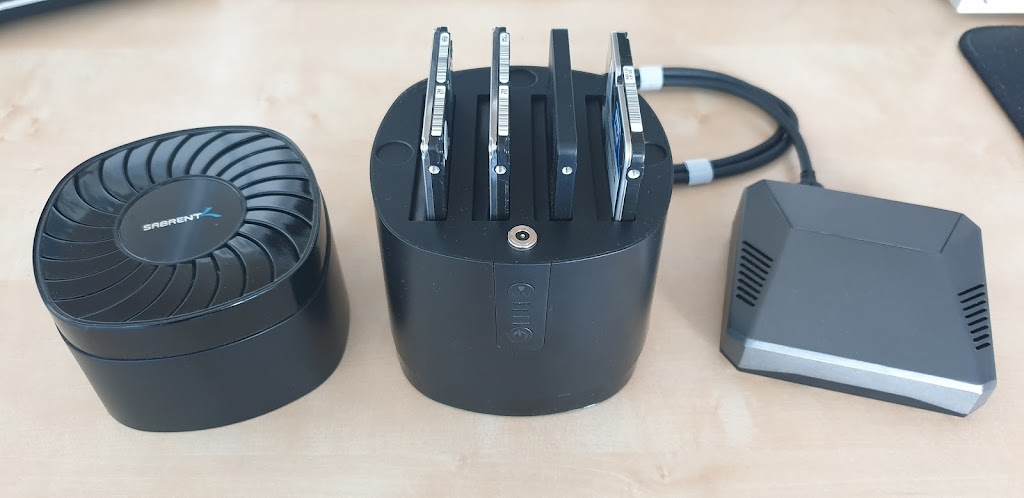
Amazing RPi 4 setup with 250GB SSD and 1.5TB storage space!

Of course, this is not the best and most powerful setup but it is an interesting
solution. All these hard drives I have laying around so I decided to
use them and it is a great addition to Raspberry Pi 4.

So what we do have here:
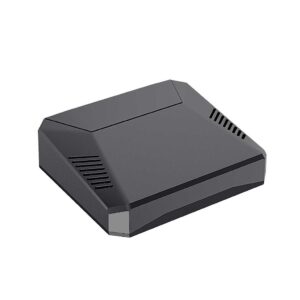
The first component here is the case for Raspberry Pi 4, Argon One. Very well design aluminum case with controlled fan for cooling and power on/off button. The fan has a little bit annoying sound. This housing is excellent for overclocking Raspberry Pi 4, I’m running all day on 2 GHz without any problem.
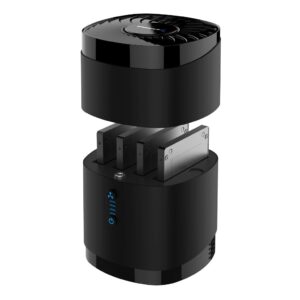
The second piece of the puzzle is a USB 3.0 hard drive docking station. Sabrent USB
3.0 4 Bay 2.5″ Hard Drive/SSD Docking Station with Fan. This is excellent for the system drive and for storage. In my system, I’m having 250 GB SSD for
system and programs and three 500 GB hard drives for storage.
I’m pretty happy with this setup, fast boot over SSD and enough space for
storage.
Thanks for visiting!
Till the next time.
How to setup File Server with Raspberry Pi

We are gonna kick off with preparing fresh copy of Raspberry PI OS Lite on empty SD card with Raspberry Pi Imager software. When is all done SD card has to be removed and inserted back into card reader so Windows can see newly created partition. In my case i’m using Notepadd++ to create empty file called “SSH” without file extension and we are gonna save it to boot partition of our SD card.

Because SSH is enabled with placing empty file called SSH in root partition of SD card, we do not need to connect Monitor, Keyboard and  Mouse to our Raspberry Pi. We are gonna be using SSH connection from another computer or even from another Raspberry Pi. From Windows computer we can use PuTTY software and from Linux computer we can to simply from terminal window.
Before we power on our Raspberry Pi, we need to insert SD card into Raspberry Pi,  connect LAN cable to network Router, connect USB hard drive and we are ready to power up Raspberry Pi.
Next step is to find out IP address of our future File Server. Because we didn’t connect monitor to our File Server, the best way to find it is to login into Router and from there read IP address of our File Server.
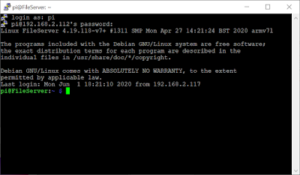
I’m using Linux terminal for connection to server, but once you are connected commands are the same from Linux or Windows.
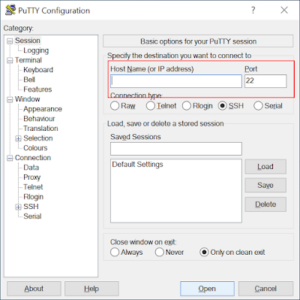
To connect from Windows, we need to open the PuTTY software, enter IP address of our File Server and click on Open button.
In the next Window we need to enter valid username and password. Default username for Raspberry Pi OS is “pi” and password “raspberry”.
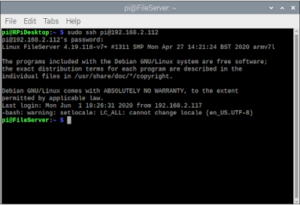
For Linux computer we need to just open terminal and enter command:
sudo ssh pi@IP_Address
and when asked enter valid password and we are connected. Now we are ready to make necessary changes to our File Server system and install necessary software.
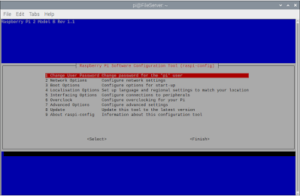
So let’s get started, first we are gonna open raspi config software by typing:

    sudo raspi-config

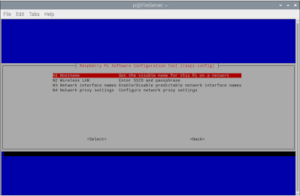
First option is to change password for “pi” user, so here we can set desired password. Next under Network Options we are gonna change default hostname to our needs, i personally like to change it to “FileServer”.
After changing Hostname, raspi-config software is gonna ask to reboot our new File Server.
In next step we have to login an update our Raspberry Pi OS on our FileServer, so to do that we are gonna enter next two command:
sudo apt update
sudo apt upgrade
Create folder for mounting our USB drive:
sudo mkdir -m 1777 /media/USB_Drive
Edit “fstab” file and add mount point for our USB Drive:
sudo nano /etc/fstab
Add at end of file next line for ntfs formated hard drive:
/dev/sda1    /media/USB_Drive    ntfs    defaults    0    1
Save changes and mount partition with next command:
sudo mount -a
Install samba server:
sudo apt install samba samba-common-bin
Edit samba config and add our share at end of file:

sudo nano /etc/samba/smb.conf

[Network share]

  comment = Network shared folder

       path = /media/USB_Drive
       browseable = yes
       writable = yes
       only guest = no
       create mask = 0777
       directory mask = 0777
       public = yes
       guest ok = yes

Add pi user to samba and set password:
sudo smbpasswd -a pi
Restart samba service:
sudo service smbd restart
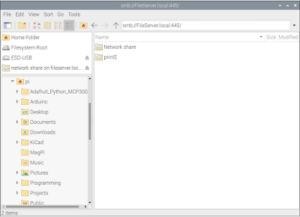
And with restarting samba service we are ready to open File Manager and browse our FileServer.
So from now on our server is ready to go, even if you turn off Raspberry Pi, everything is starting automatically with booting Raspberry Pi OS.
Thanks for visiting!
Till the next time.
How to make a fresh copy of micro SD card for Raspberry Pi from Windows 10 operating system

In this article, I will explain how to prepare a micro SD card from Windows 10 with a fresh copy of Raspberry Pi OS, so let’s start:

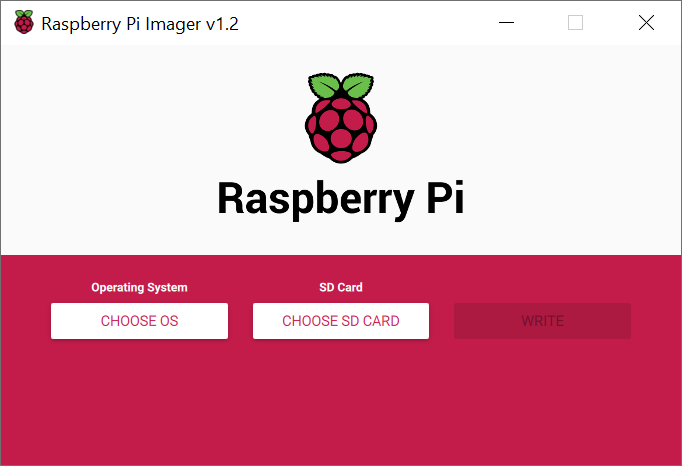
The first step is to refer the web browser to the official website raspberrypi.org and download the Raspberry Pi Imager software, which we will use to prepare a micro SD card for installing the Raspberry Pi OS on a Raspberry PI computer.

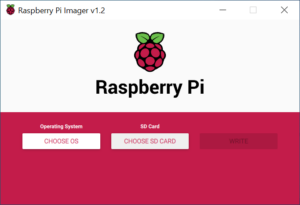
  • Open the Raspberry Pi Imager software on your Windows 10 computer.
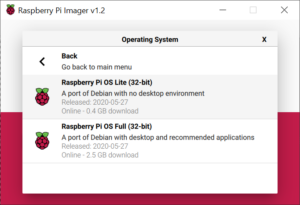
  • Click the CHOOSE OS button.
  • Select the version of the OS you want to install.
  • Click the CHOOSE SD CARD button.
  • Select the SD card, which you want to prepare for the installation of the Raspberry Pi OS.
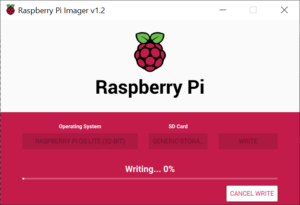
  • Click on WRITE button to start writing to SD card.
  • Wait until writing is complete.

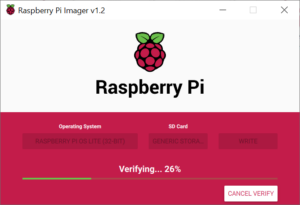
  • Wait a little bit more, until the written data is verified.
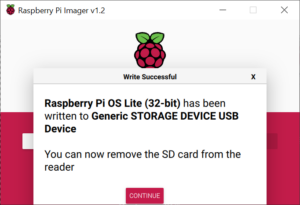
  • Clicking the DONE button completes the SD card preparation.
And all we have to do is insert the SD card into the Raspberry Pi and install the Raspberry Pi OS.
Until next time, thanks for visiting!