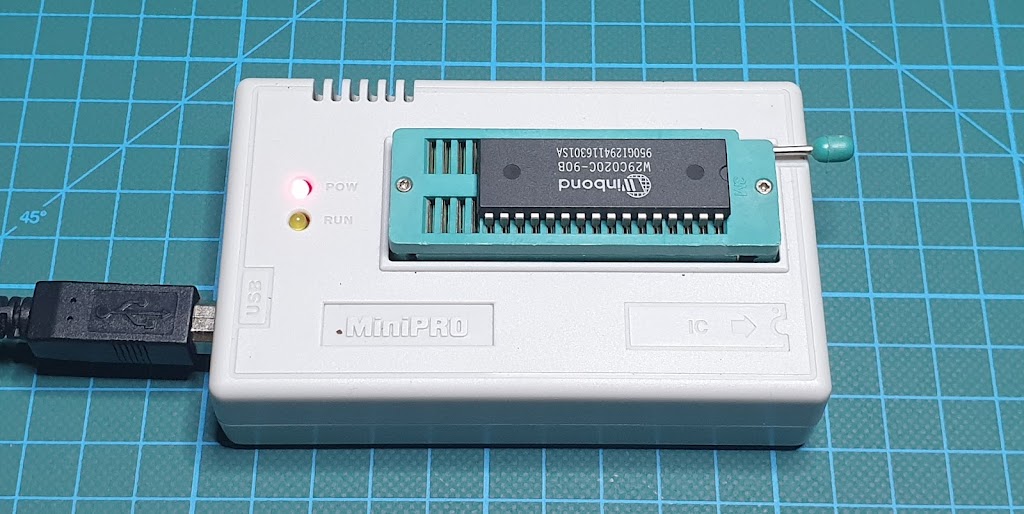
MiniPRO TL866xx universal programmer Linux installation.

The TL866A universal programmer is a chip programmer that allows us to write or read chip memory such as microcontrollers, EEPROM memory, etc. This very popular device, unfortunately, comes with software only for the Windows operating system. But there is an open-source alternative that allows the use of this device on the Linux operating system, thanks to David Griffith and his project on GitLab.


Installation:

Install build dependencies:

sudo apt install build-essential pkg-config git libusb-1.0-0-dev

Get source code:

git clone https://gitlab.com/DavidGriffith/minipro.git

Compile source code:

cd minipro
make

Install application:

sudo make install

Udev configuration:

sudo cp udev/*.rules /etc/udev/rules.d/
sudo udevadm trigger

Add regular user to the plugdev group:

sudo usermod -a -G plugdev YOUR-USER

Reboot your system.

Basic usage:

Show all available options:

minipro

Show version information:

minipro -V

Read from the device and save to a file:

minipro -p W29C020C -r test_w29c020c.bin

Erase the device:

minipro -p W29C020C -E

Blank check:

minipro -p W29C020C -b

Write from file to the device:

minipro -p W29C020C -w test_w29c020c.bin

I am very pleased with this installation, everything went without a single problem and the universal programmer works flawlessly. Many thanks to the open-source community and fingers up for David’s project on GitLab.

Stay healthy and safe till the next time!
Basic commands and using PICkit 2 on Linux!

Now that we have the software installed and ready to use, it is time to get familiar with the basic commands to successfully load the program into the microcontroller. So let’s get started!

Checking version:

pk2cmd -?V

# Returned output:

Executable Version:    1.20.00
Device File Version:   1.55.00
OS Firmware Version:   2.32.00


Operation Succeeded

Auto-detect PIC:

pk2cmd -P

# Returned output:
Auto-Detect: Found part PIC16F887.


Operation Succeeded

Erase a device:

pk2cmd -P -E

# Returned output:
Auto-Detect: Found part PIC16F887.

Erasing Device...

Operation Succeeded

Blank check:

pk2cmd -P -C

# Returned output:
Auto-Detect: Found part PIC16F887.

Device is blank

Operation Succeeded

Program a device:

pk2cmd -PPIC16F887 -J -M -Ftest_write.hex

# Returned output:
PICkit 2 Program Report       
2-1-2021, 1:17:27
Device Type: PIC16F887

Program Succeeded.

Operation Succeeded

Power a device and release reset:

pk2cmd -P -A5 -T -R

# Returned output:
Auto-Detect: Found part PIC16F887.


Operation Succeeded

Read a device:

pk2cmd -PPIC16F887 -J -R -GFtest_read.hex

# Returned output:
Read successfully.            

Operation Succeeded
I believe this is enough to get started with PICkit 2 Development Programmer / Debugger on Linux OS.
Stay healthy and safe till the next time!
Install PICkit 2 Development Programmer / Debugger on Raspberry Pi OS.

To install PICkit 2 Development Programmer / Debugger on Raspberry Pi OS, we are gonna first prepare our system by installing dependencies, download source code for PICkit 2 command-line application, compile it, and at the end verify test installation.

So for that, we are gonna use these commands as follows:

Update and Install dependencies:

sudo apt update
sudo apt install build-essential libusb-dev

Download and unpack the source files:

wget https://ww1.microchip.com/downloads/en/DeviceDoc/pk2cmdv1.20LinuxMacSource.tar.gz
tar xzvf pk2cmdv1.20LinuxMacSource.tar.gz
cd pk2cmdv1.20LinuxMacSource

Building the application:

make linux

Installing the application:

make install

Adding device file location to PATH:

echo 'export PATH="$PATH:/usr/share/pk2"' >> ~/.bashrc

Reboot system and test installation:

pk2cmd -?v

# PICki2 not connected
Executable Version:    1.20.00
Device File Version:   1.55.00
OS Firmware Version:   PICkit 2 not found

# PICkit2 connected
Executable Version:    1.20.00
Device File Version:   1.55.00
OS Firmware Version:   2.32.00

Uninstall pk2cmd:

Remove file pk2cmd from /usr/local/bin:
sudo rm -R /usr/local/bin/pk2cmd

Remove all files from /usr/share/pk2/:
sudo rm /usr/share/pk2/*

Remove folder /usr/share/pk2/:
sudo rm -R /usr/share/pk2

Edit file .bashrc:
sudo nano ~/.bashrc

Find and Remove line :
export PATH="$PATH:/usr/share/pk2"

Stay healthy and safe till the next time!
Install PICkit 2 Development Programmer / Debugger on Debian 10 Buster 64-bit.

To install PICkit 2 Development Programmer / Debugger on Debian 10 Buster 64-bit, we need to install library packages for i386 architecture. That we can do with Multiarch. What is Multiarch? Multiarch lets us install library packages from multiple architectures on the same machine.

So for that, we are gonna use a couple of commands to print current architecture, check foreign architecture, and add a new architecture.

The first command is gonna print the current machine architecture:

dpkg --print-architecture
amd64

The second command is gonna print foreign machine architecture. If print nothing, means we don’t have foreign machine architecture added to our system:

dpkg --print-foreign-architectures

The next step is a way to add foreign machine architecture to our system:

dpkg --add-architecture i386

So now if we do check for other available architectures, it should print i386:

dpkg --print-foreign-architectures
i386

Now we need to install dependencies for compiling our source files:

sudo apt update
sudo apt install build-essential libusb-dev

That’s all for preparing the system. The next step is downloading and unpacking the source files:

wget https://ww1.microchip.com/downloads/en/DeviceDoc/pk2cmdv1.20LinuxMacSource.tar.gz
tar xzvf pk2cmdv1.20LinuxMacSource.tar.gz
cd pk2cmdv1.20LinuxMacSource

Building the application:

make linux

Installing the application:

make install

Adding device file location to PATH:

echo 'export PATH="$PATH:/usr/share/pk2"' >> ~/.bashrc

Reboot system and test installation:

pk2cmd -?v

# PICki2 not connected
Executable Version:    1.20.00
Device File Version:   1.55.00
OS Firmware Version:   PICkit 2 not found

# PICkit2 connected
Executable Version:    1.20.00
Device File Version:   1.55.00
OS Firmware Version:   2.32.00

Uninstall pk2cmd:

Remove file pk2cmd from /usr/local/bin:
sudo rm -R /usr/local/bin/pk2cmd

Remove all files from /usr/share/pk2/:
sudo rm /usr/share/pk2/*

Remove folder /usr/share/pk2/:
sudo rm -R /usr/share/pk2

Edit file .bashrc:
sudo nano ~/.bashrc

Find and Remove line :
export PATH="$PATH:/usr/share/pk2"

Stay healthy and safe till the next time!
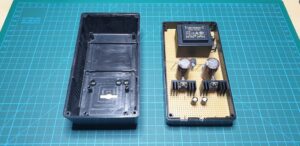
Split-rail linear power supply DC/15-0-15V.

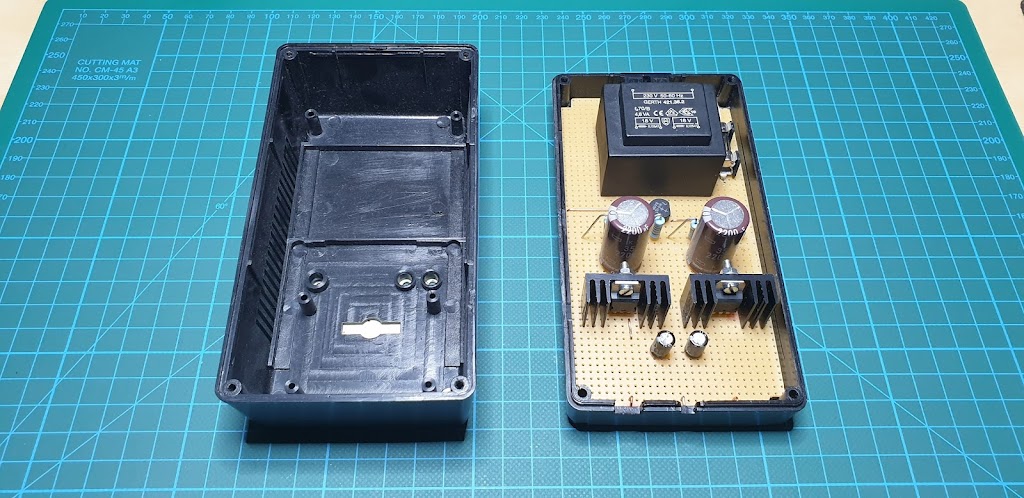
Simple linear split-rail power supply for experiments with low power amplifiers and audio signals. This project is very easy to make and does not require a lot of time to make. But here you are working with mains voltage so you have to be very careful. 
So, if you are following along you are doing so at your own risk.

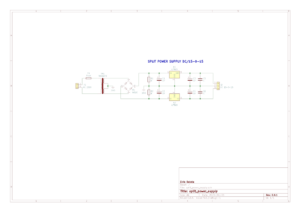
The project itself is easy to do and it is desirable to have this kind of power supply in the workshop. From the diagram shown in the image below we see that we need very few parts to make. We need the following components:
Fuse and Fuse holder,
Transformer 220V/18-0-18V,
Bridge rectifier,
Capacitor x 6 pcs,
Voltage regulator (positive and negative),
Project box,
Experiment board (PCB).
Making procedure:
First, we need to cut the experiment board (PCB) to size for fitting in our project box. Next, we are placing components and solder them to PCB connect tie-point together with a solid core wire. For the output connector, it’s recommended to use 4mm banana sockets in three different colors, for example, Black for GND, Red for +15V, and Blue for a -15V.
Stay healthy and safe till the next time!
RC Filter Calculator (low-pass and high-pass)


RC Filter Calculator

Here is simple RC filter calculator for calculatie cut-off frequency of a low-pass and high-pass rc filter:

RC Filter Calculator v1.0
R = Ohm
C = Fahrad
f = Hertz

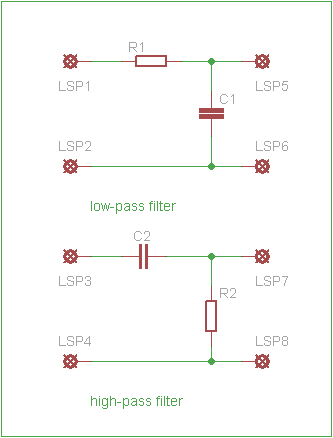
low-pass filter is a filter that passes signals with a frequency lower than a certain cutoff frequency and attenuates signals with frequencies higher than the cutoff frequency.
high-pass filter is an electronic filter that passes signals with a frequency higher than a certain cutoff frequency and attenuates signals with frequencies lower than the cutoff frequency.

More about low-pass and high-pass filer can be found on wikipedia.